Posts

Showing posts with the label earrings

Quickie DIY: Vintage Earrings Refashion to Fringe Cone Earrings

Image
I found this cute pair of vintage cone shaped pierced earrings at one of my favorite local thrift shops: Kathleen's Closet . Their sales support the  Community Food Bank of NJ . I love finding bargains that help the Food Bank and other helping organizations. I bought this pair with the plan of using this as part of a DIY. I had these fringe beads sitting in my stash... they turned to be perfect for this quickie DIY. I bought them last year on clearance from  Michaels . I selected the brown, black, red and silver fringe bead strands because they were the only duplicate colors. I took them off the chain, and separated them; one for each side. I took a gold tone head pin and threaded it through the top of each cone. I threaded the beaded strands onto each head pin. Then, I curled each wire and trimmed them. Last step... I bent the wire back up into the cone. Here I am, modeling my new creation. Not bad for about 10 minutes of...

Vintage Bargain Buy Screwback Earring Restyled as an Earcuff

Image
 I was on a lunch break earlier this week, and I stumbled onto this vintage pair of screwback crystal earrings. They were marked $3.88, but I got them for 20% off, along with some other bargain goodies.  Anyway, I don't wear screwback or clip on earrings because they hurt my ears... but I turned them upside down (as shown in the photos). So....I put them over the tops of my ears, and twisted the screws until they stayed put. Gravity did the rest. Selfie time! Close up.... I got a lot of compliments at work from the other ladies. They loved my ear cuff, but they were annoyed that they were vintage.

Quickie DIY: Upcycled Vegan Leather / Pleather Purse Scraps to Earrings

Image
I had a busted black pebbled "vegan leather" (pleather) purse that was ripe for upcycling. So, I got my trusty Vintaj Big Kick, the Sizzix #657014 die together.   I cut two scrap pieces off and ran them through to cut out pieces, like what was shown on the cover of the die.     Then, I took two jade cross post earrings and took them apart. I attached the posts and crosses to each earring.   Ta - dah!!!! All done!!!  

Upcycled Versace Denim Rivets to Post Earrings with Business Card

Image
It's stash busting time.... I have a pile of worn out jeans, and I've been pinning "like crazy" on my Pinterest board "Forever in blue jeans" . So, I decided to start small. I wanted to make earrings out of the rivets!     This pair follows the same procedure as yesterday, but it's a pair of torn up black Versace Couture jeans.   (BTW.... a mint pair is for sale by other vendor on  Etsy for $130.)     Mine is below.   Close up on the rivets before removal:   Again, glue: Backs:     Finished product; ready to wear. I made two pair, and have lots of scrap.   Close up of the studs: Here's the donor pair; a torn-up pair from my boys. It was Old Navy.

Upcycled Denim Rivets to Post Earrings with Business Card

Image
It's stash busting time.... I have a pile of worn out jeans, and I've been pinning "like crazy" on my Pinterest board "Forever in blue jeans" . So, I decided to start small. I wanted to make earrings out of the rivets!   Here's the donor pair; a torn-up pair from my boys. It was Old Navy.     Close up of the "1994" rivet:   Brand new posts.   Rivet trimmed with a little bit of denim.   Two sets, all prepped for the application of glue:   Here's the final product, on punched card stock, with my business card info. Hey, it's multi-purpose: a display and a marketing tool.   Here's the close up of the earrings on the card.

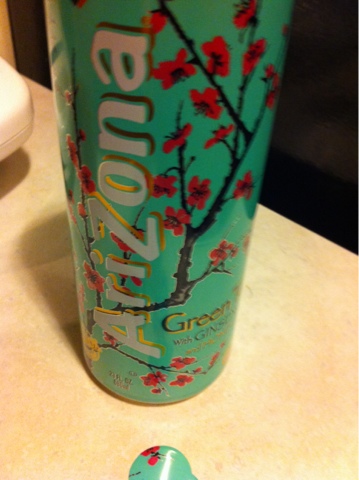
Arizona Green Iced Tea Can to Earrings

Image
I took an Arizona Ice Tea (Green Tea) can, rinsed it out...   and cut off the top and down the side with metal shears (safety first).   Then, I cut out 1" x 1" squares, and then used my Sizzix Vintaj Big Kick with a round tag cutter.   Then, I added an oval jump ring, and a French hook. I made another earring and put then onto a tag I made (later post).

Quickie DIY: Vintage Green Shell Earrings

Image
Here's another quickie DIY I did. I picked up these vintage shell earrings in a grab bag lot at an estate sale recently. One was missing an earring hook, and the "silver" was peeling and tarnishing.     So, I used my 18 karat gold leafing pen by Krylon, and applied the gold leafing.     Then, I upgraded the hook to a French Hook with a clear stopper.   Last, I found a printable pdf from www.howaboutorange.blogspot.com and printed it out on brown kraft paper (from a box about to be recycled). Then, I cut the cards out, punched holes and hung the earrings.   Ta dah! They are ready for gift giving or selling, all nice and professional looking.

Quickie DIY: Silvertone Sea Shell Earrings

Image
  I went through my pile of jewelry findings and beads this past weekend, and I pulled out these, so.... I was inspired.....     I pulled out six headpins that had shells and sea stars, along with some French hooks and beads. The beads were originally from broken jewelry.   So.... on went the French hooks.   I strung six beads on each earring form.   Here's what they look like in the sunlight. The goldstone beads and glass beads really pick up the sunlight and SPARKLE plenty!   Total time: approximately 30 minutes... I had a little trouble deciding which beads to put on the headpins.

Quicky DIY: Green Onyx Pyramid Stud Earrings

Image
Here's a "Quicky DIY" I did over the weekend..... I bought a cute pair of Green Onyx pyramids (the color looks a lot like jade) from Gary's Gem Garden  in Cherry Hill, NJ. I also bought two silver (not silvertone) backs. I got the deal for less than $15. I glued the backs on with heavy duty jewelry adhesive.... and they're good to go!

Pinspiration: Pinned on Pinterest: Vintage Suitcase Turned into a Jewelry Organizer

Image
I am a Pinterest fan, but I didn't want to turn into strictly a pinner. I wanted to be "Pinspired", and actually do a DIY. I pinned this really fun little project  Vintage Suitcase Turned Jewelry Display  from Richmond Craft Mafia onto my pinboard  DIY: Jewelry . So.... here's what I did on 3/3:   I picked up a small suitcase at an estate sale a few weeks ago. It cost me $5. It probably was a makeup case. My younger son repaired the peeling up lining with our trusty glue gun.... Thank you Johnnie! Then, I used 3 yards of coordinating lace trim, and I spaced them 1.5" apart. I ran it as one continuous strip from one side to the other, and secured them with hot glue. I had a little bit of lace trim left over, so I used it to cover the hinge, and secured it in the back of the display.  Then, I turned it on its end, and put my earrings on it. Ta-dah!!!!! All done!!!!